


Intro
Firstly i would like to thank the fine folks who have set up and run this forum ( many of whom have helped me directly or indirectly over the years to get me to the point where i am today ) . As is the way with our community it is only fair that i pass on the skills and info i have picked up or been shown to the next generation of growers so they can benefit from it and pass it on to the generations to come .
None of the techniques shown in my guide are anything new or untested BUT this guide is aimed at growers who are already competent and will have probably already have used most of the techniques featured below . This guide is purely to show how and when they should be used to get the maximum out of them and in turn maximise your yield per plant . Also this guide is not strictly for growing massive plants that tbh the majority of folks don't really have the room for ( thats just the way i like to roll) . the veg time can be shortened by a few weeks for those who wish to keep the plants smaller if they are restricted space wise and it also negates the need for a scrog screen so plants can still be moved around if needs be .
The plant shown below is a wappa by paradise seeds which i grew out in my tree machine a couple of years bk and is def a strain i highly recommend for using this technique due to it's hardiness and structure ( also one of my favourite smokes )
Stage 1 - topping
The majority of growers top their plants at the 4th node which is no different for me but where most people do it in order to create 2 grow tips I do it for 2 main reasons:
1. it keeps the main stem short allowing me to train the canopy while the plant is still short .
2. it stunts the growth at the top of the plant allowing the low down growth to catch up with the top which in turn creates the even canopy I always aim for .
This pic shows a wappa from an earlier grow which has been topped at the 4th node ( plant around 2 weeks old )
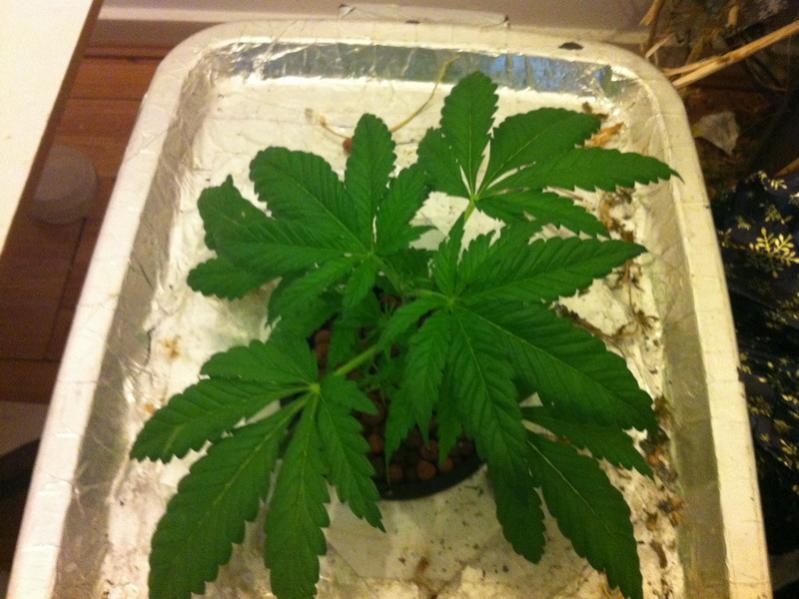
as well as topping the plant at the 4th node I also remove to fan leaves from that node to allow light to penetrate the inner structure of the plant which in turn allows the branches forming at the lower nodes access to light . This can be seen in the pic below and was taken several days later to show the lower growth has begun to catch up with the top of the plant.
Stage 2 - supercropping and HST
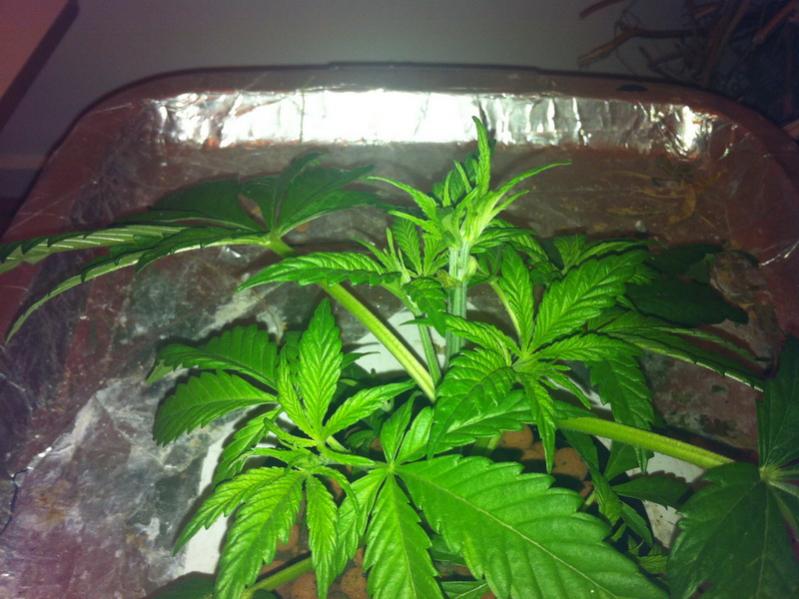
This is where things get a little brutal and the reason why the guide is aimed at the more experienced growers among us . The plants should have had a week or 2 to recover from stage 1 and the growth should now be long enough to allow you to basically flatten the plant to get the basis for the final shape of your bush (shown in the pic below) . To begin you must gently supercrop the stem of each branch close to where they join the main stem of the plant ( you do this by gently squeezing the stem between your finger and thumb until you feel the stem crush as this stop it from snapping when you bend it) . The branches should then be bent horizontal and anchored in place using string or fishing line to the edge of the tub or anything else you can use as long as it's kept flat . ( plant around 4 weeks old by this point)

once this has been done you should end up with something like the plant shown in the pic below
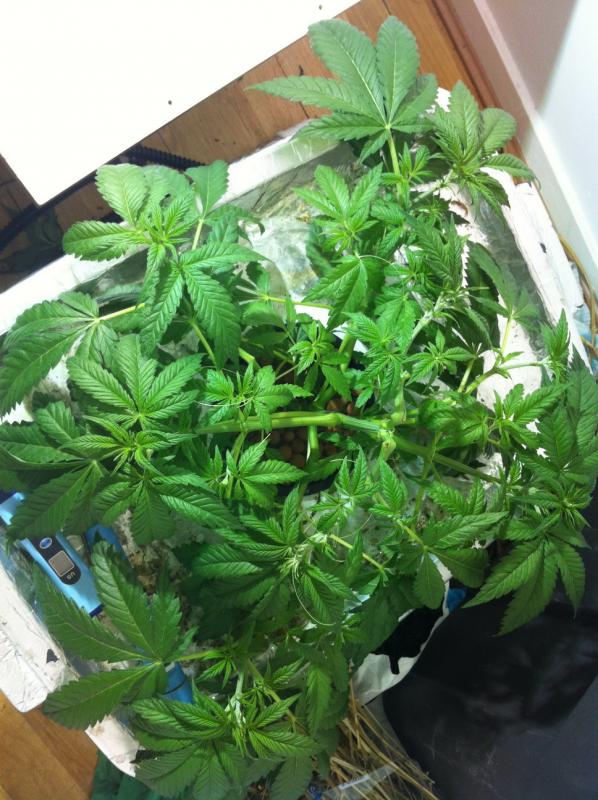
Within a few days the plant should have adjusted itself to it's new shape and all the growth should be facing up again as shown below .
A week further on from stage 2 and the plant should now be thriving , all that is required from here on in is a little pruning of leaves that cover any tips and the tieing down of any tips that grow taller than the rest .
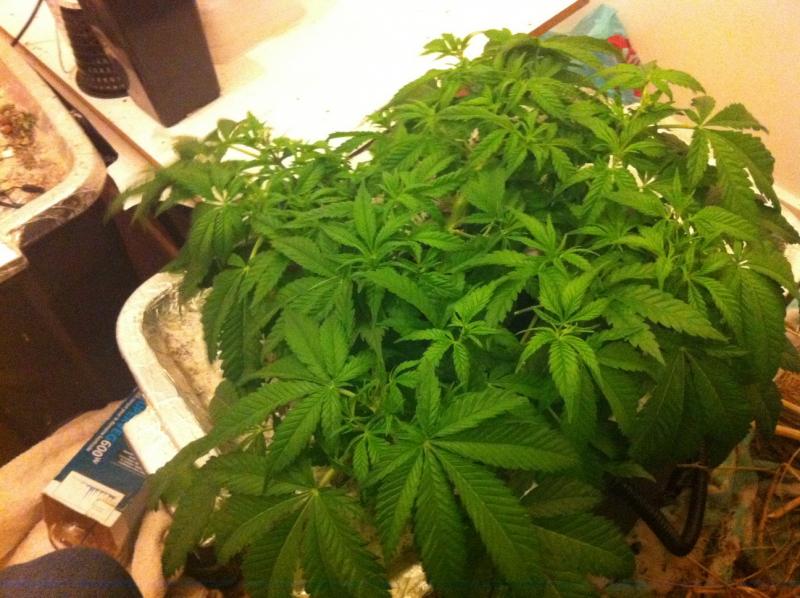
As the weeks progress the plant should keep it's shape and should almost double in size every week until you decided to induce flowering . The pic below was taken 2 weeks after stage 2.
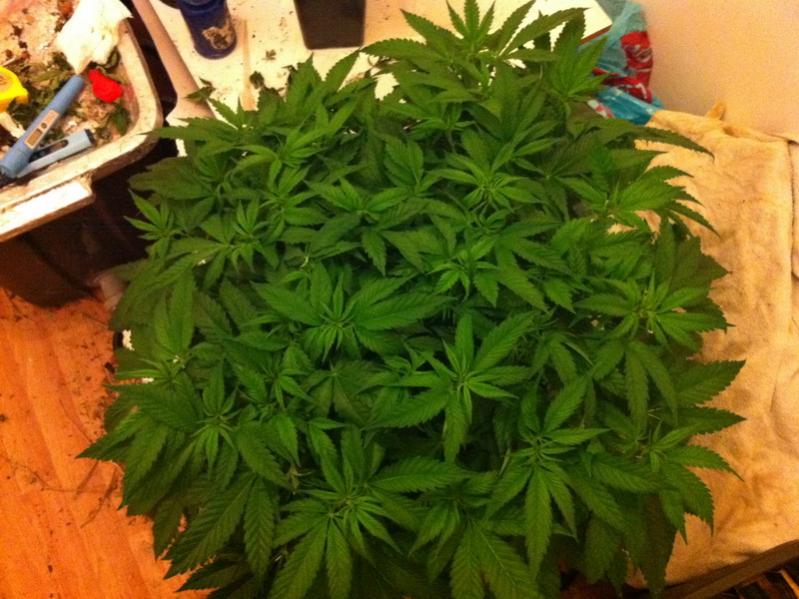
3 weeks after you should have something like this :

4 week later it should look like this : this works out around 8 weeks veg at which point i would be flipping to 12/12 to induce flowering but as you have seen it could have been flipped several weeks earlier for those with less space .

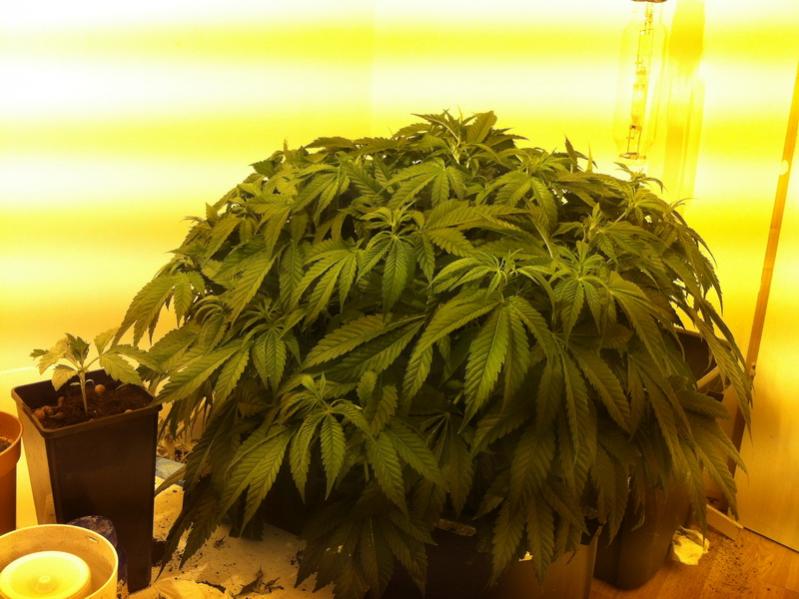
Depending on flowering time and space you should end up something like this :
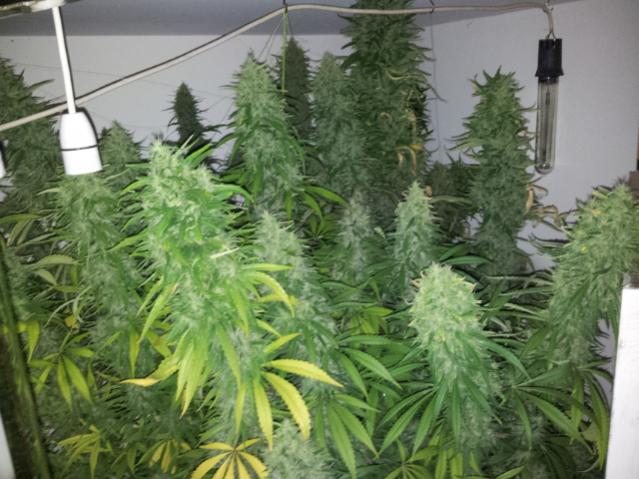
hopefully this guide will be of some use to you fine folks and as always , If you have any questions feel free to ask me here or in any current diary . Thanks for reading . G
Edited by G_UNIT, 30 August 2015 - 09:27 AM.


